This manual walks one concrete job end to end instead of listing features. Every step carries a screenshot taken from the running product, so you can click along.
Example one
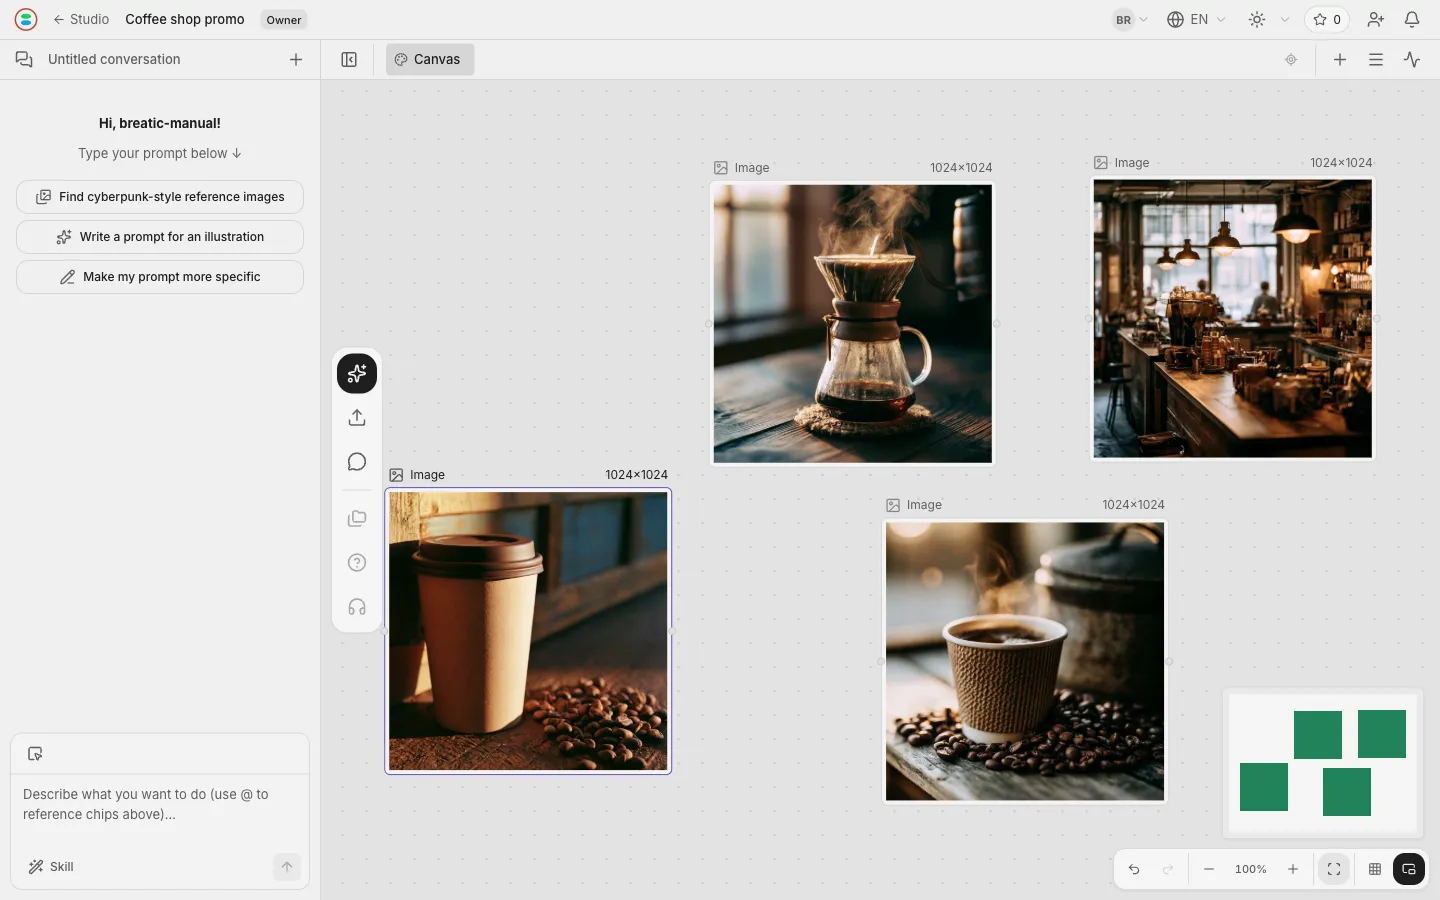
Three style-matched promo images for a coffee shop
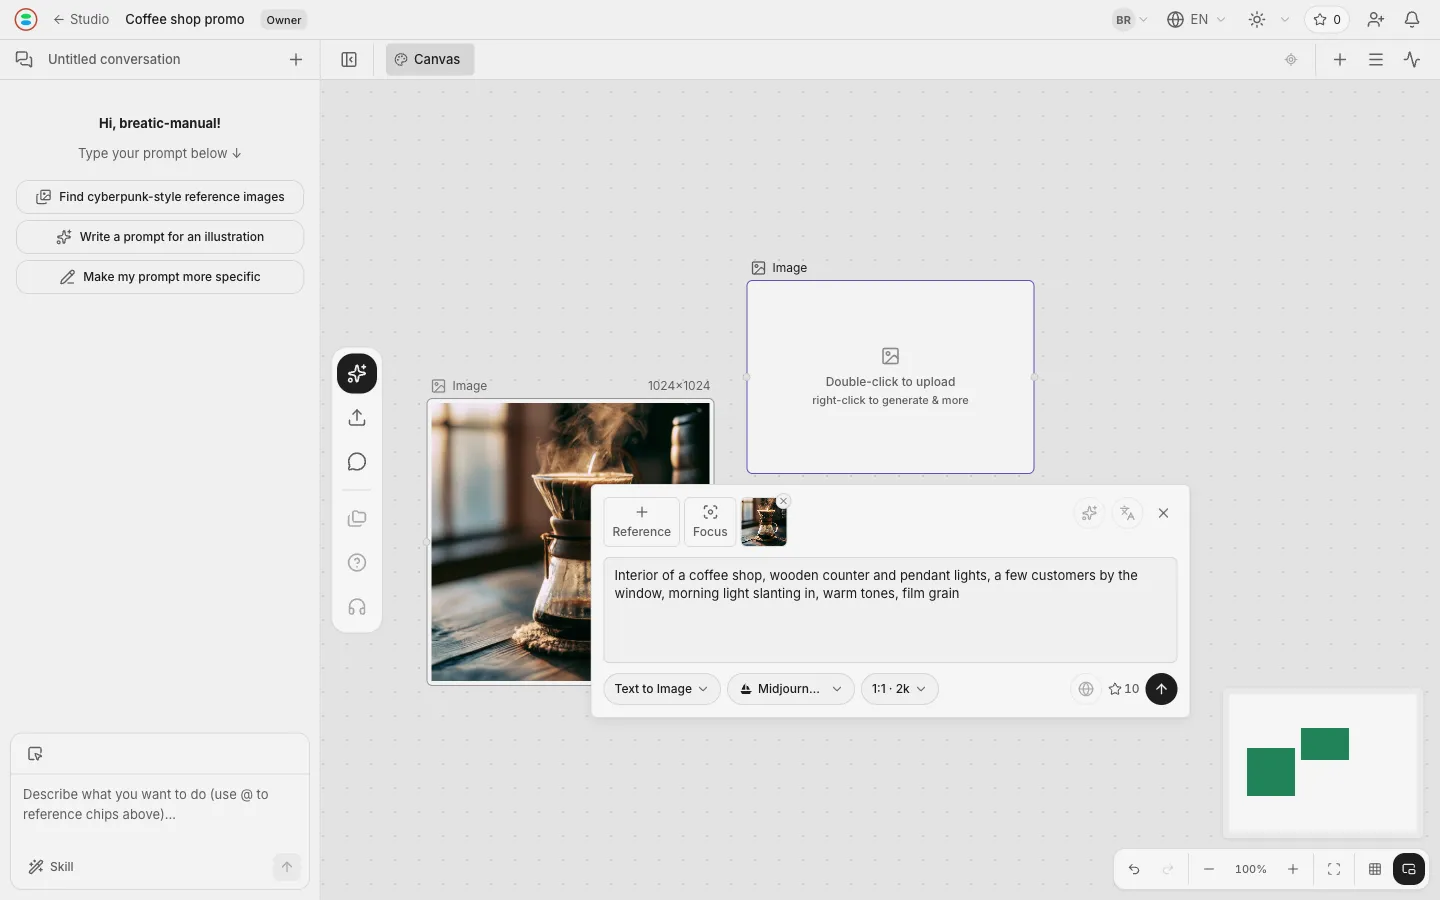
A pour-over close-up, the room, a takeaway cup. All three should read as one shoot: same palette, same light, same grain.
A single-shot image tool cannot do this — the same prompt twice comes back in two different styles. The point of this example is that the first image on the canvas becomes the style source for the ones after it.
The last step runs the same prompt with no style reference, so the difference is something you see rather than something we claim.
All four images use Midjourney V7 at 10 credits each, 40 credits in total.
Steps
01
Create a Project and pick Canvas
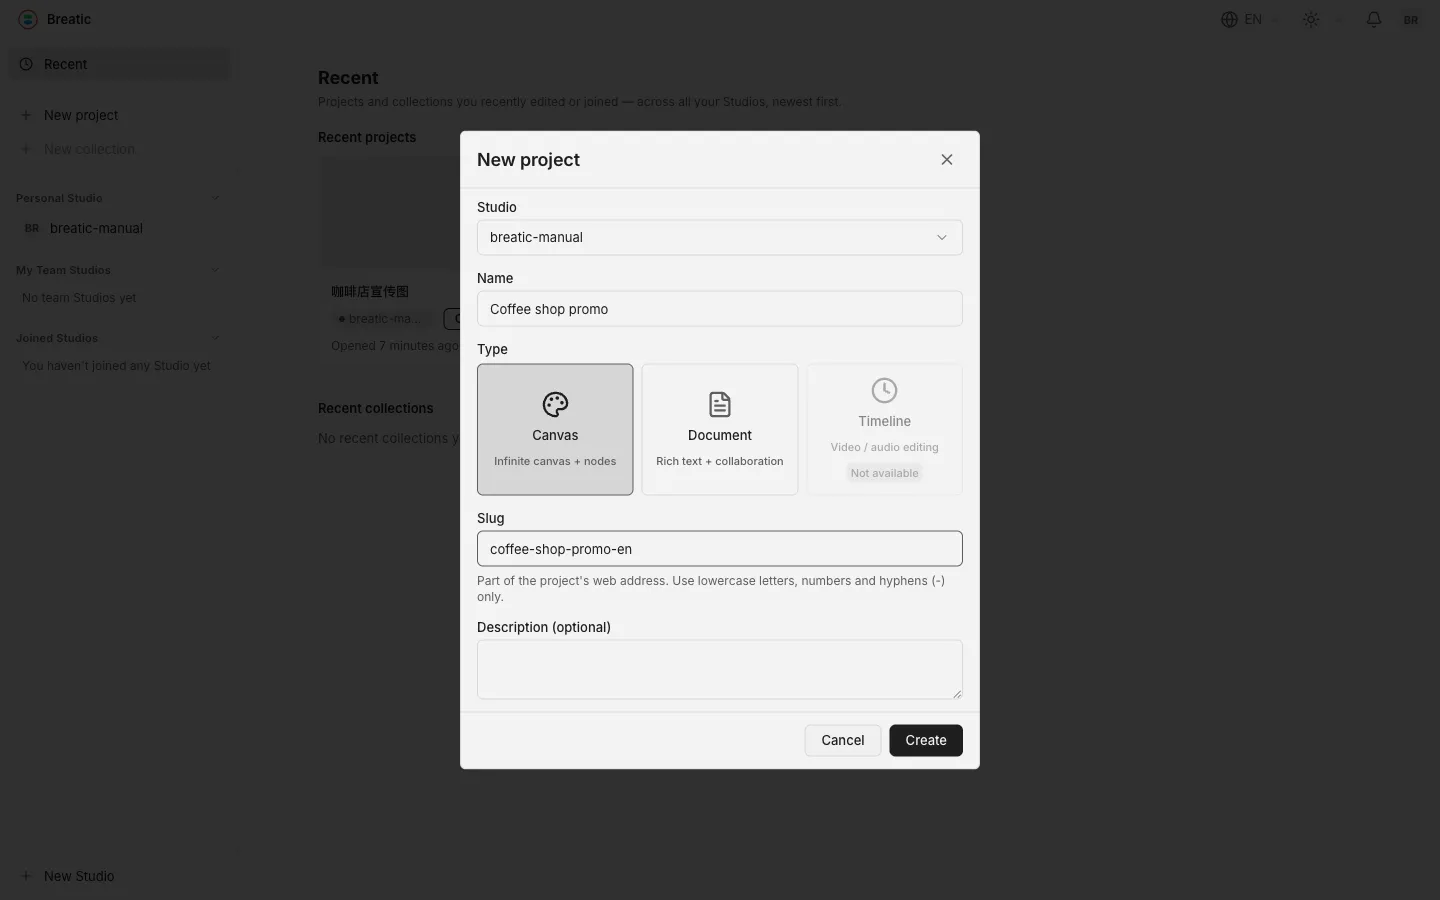
Click "New project" on the left, give it a name, choose Canvas.
The dialog settles four things at once: which Studio it belongs to, what the Project is called, which kind of Space it opens with, and the slug in its address. Canvas is "Infinite canvas + nodes", Document is "Rich text + collaboration", Timeline is marked "Not available" and cannot be picked.
The slug is not filled in for you, so type one; leaving it empty also works.
02
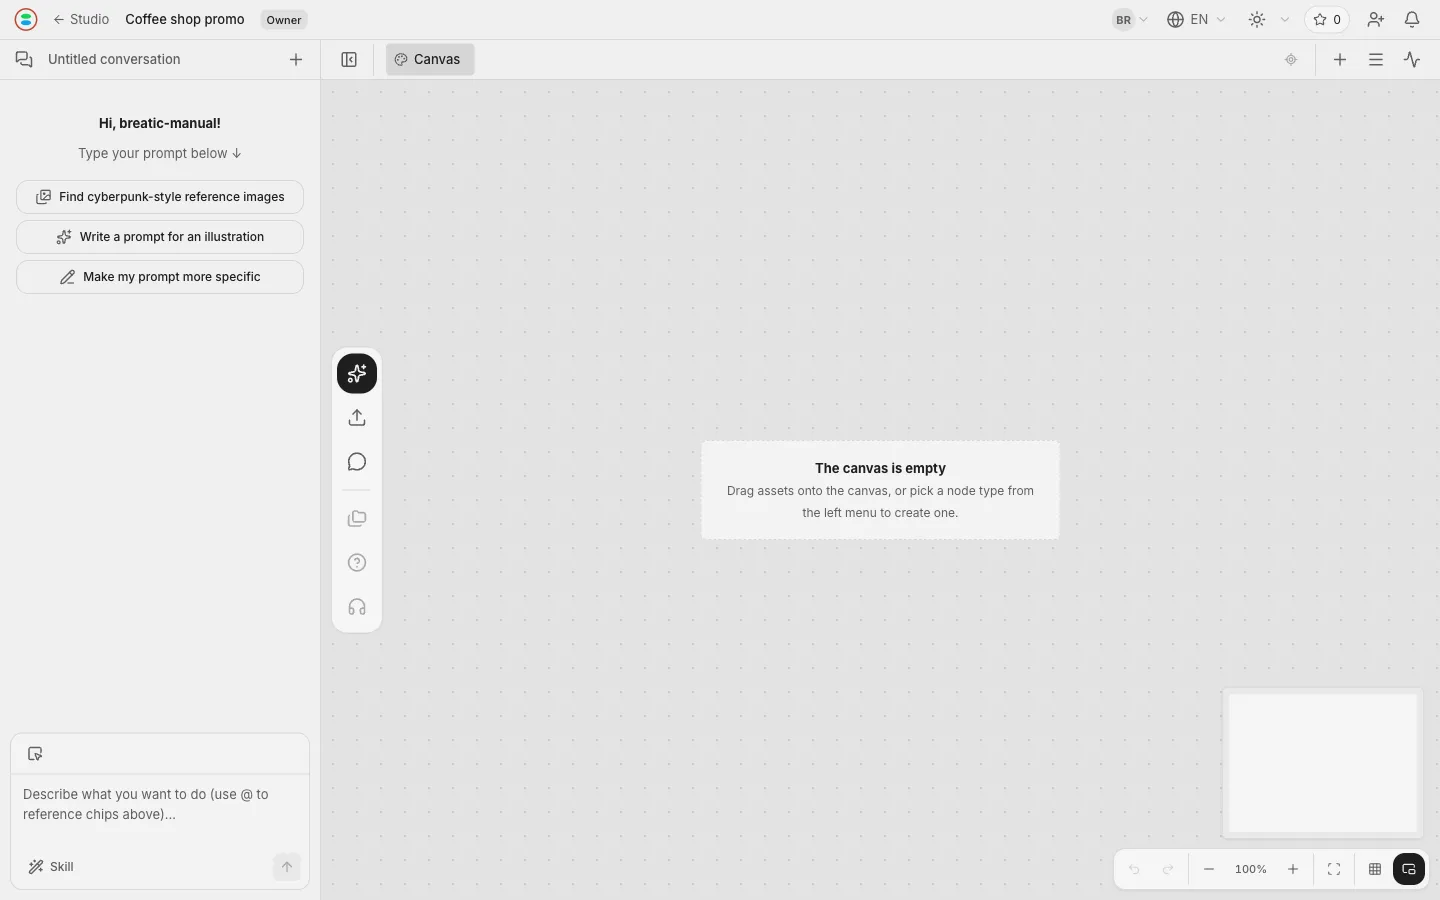
You land on an empty canvas
The middle of the canvas reads "The canvas is empty" and "Drag assets onto the canvas, or pick a node type from the left menu to create one."
The vertical strip on the left is the create menu; the cluster bottom-right is the viewport toolbar (undo/redo, zoom, fit to window, grid snap, minimap). The whole left column is the Agent panel.
03
Create an image node from the node library
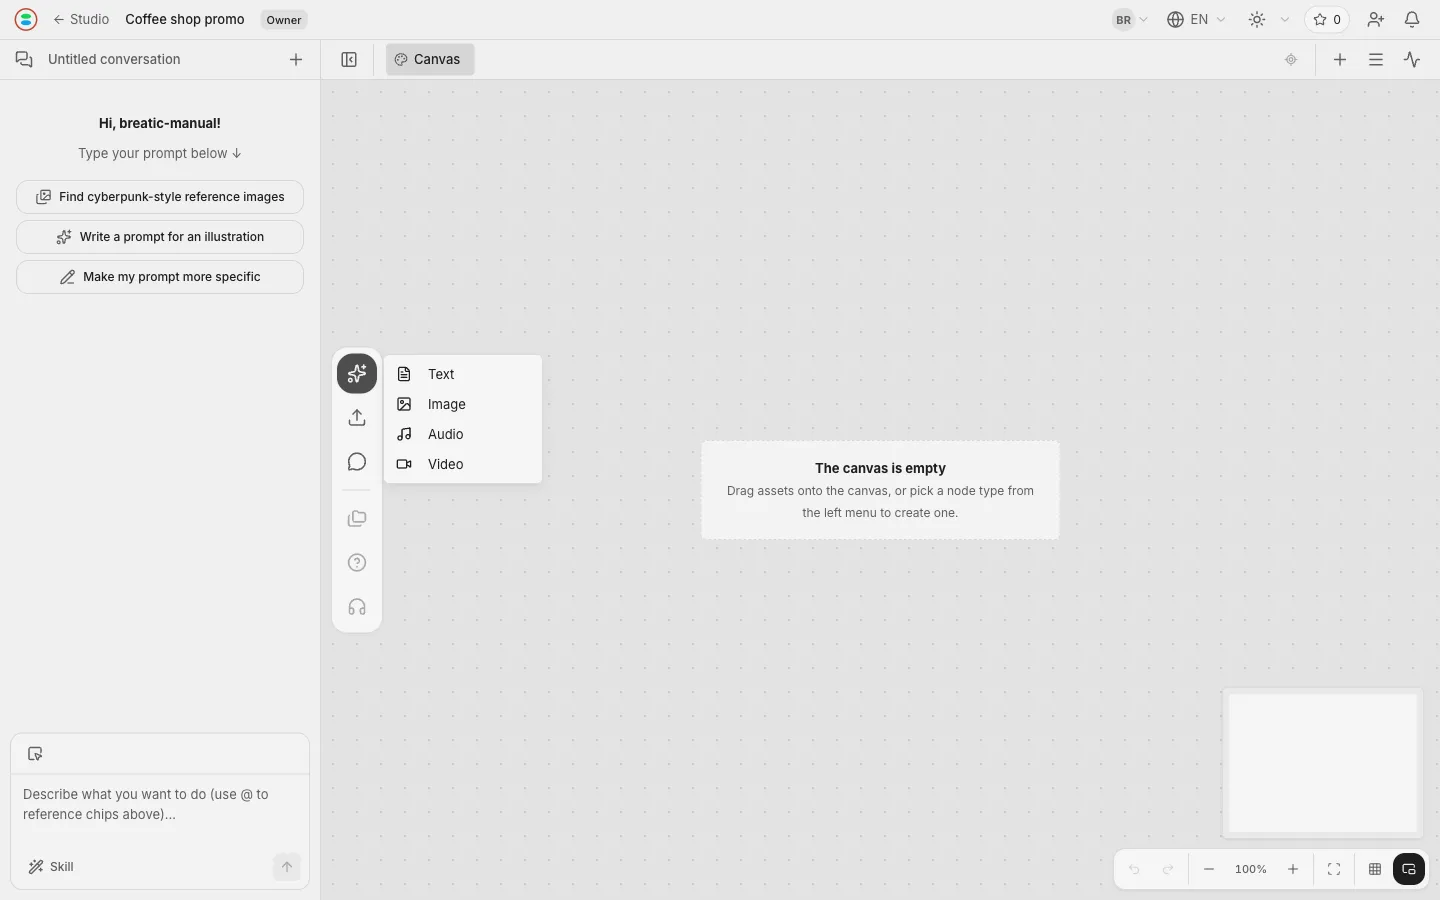
Click "Node library" at the top of the create menu.
There are four node types: text, image, audio, video. This example makes images, so pick Image.
04
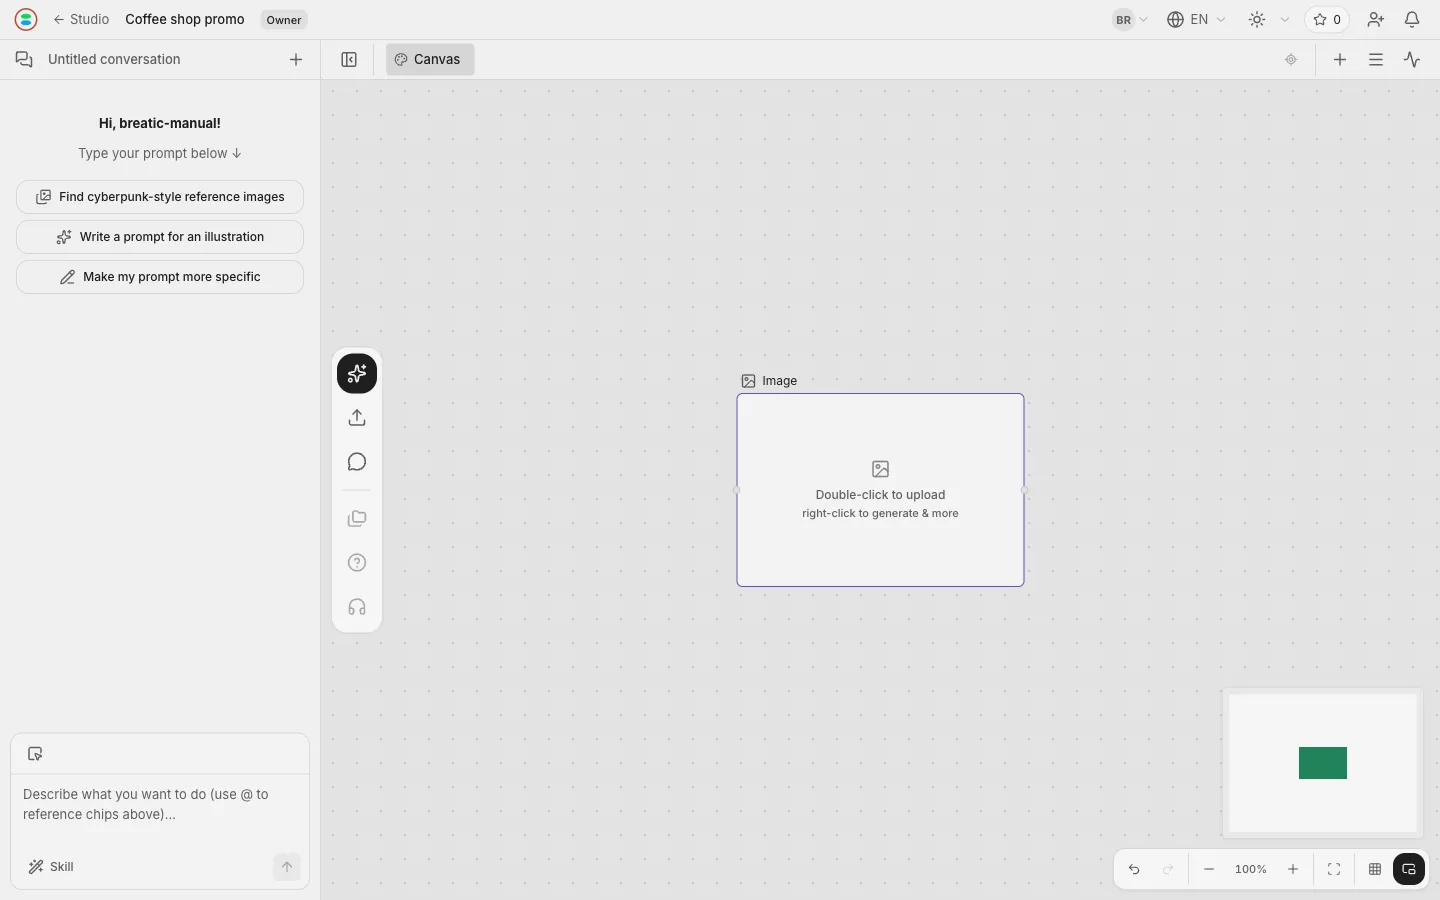
The empty node appears
The node reads "Double-click to upload" and "right-click to generate & more" — two routes: upload what you already have, or right-click to have it generated.
05
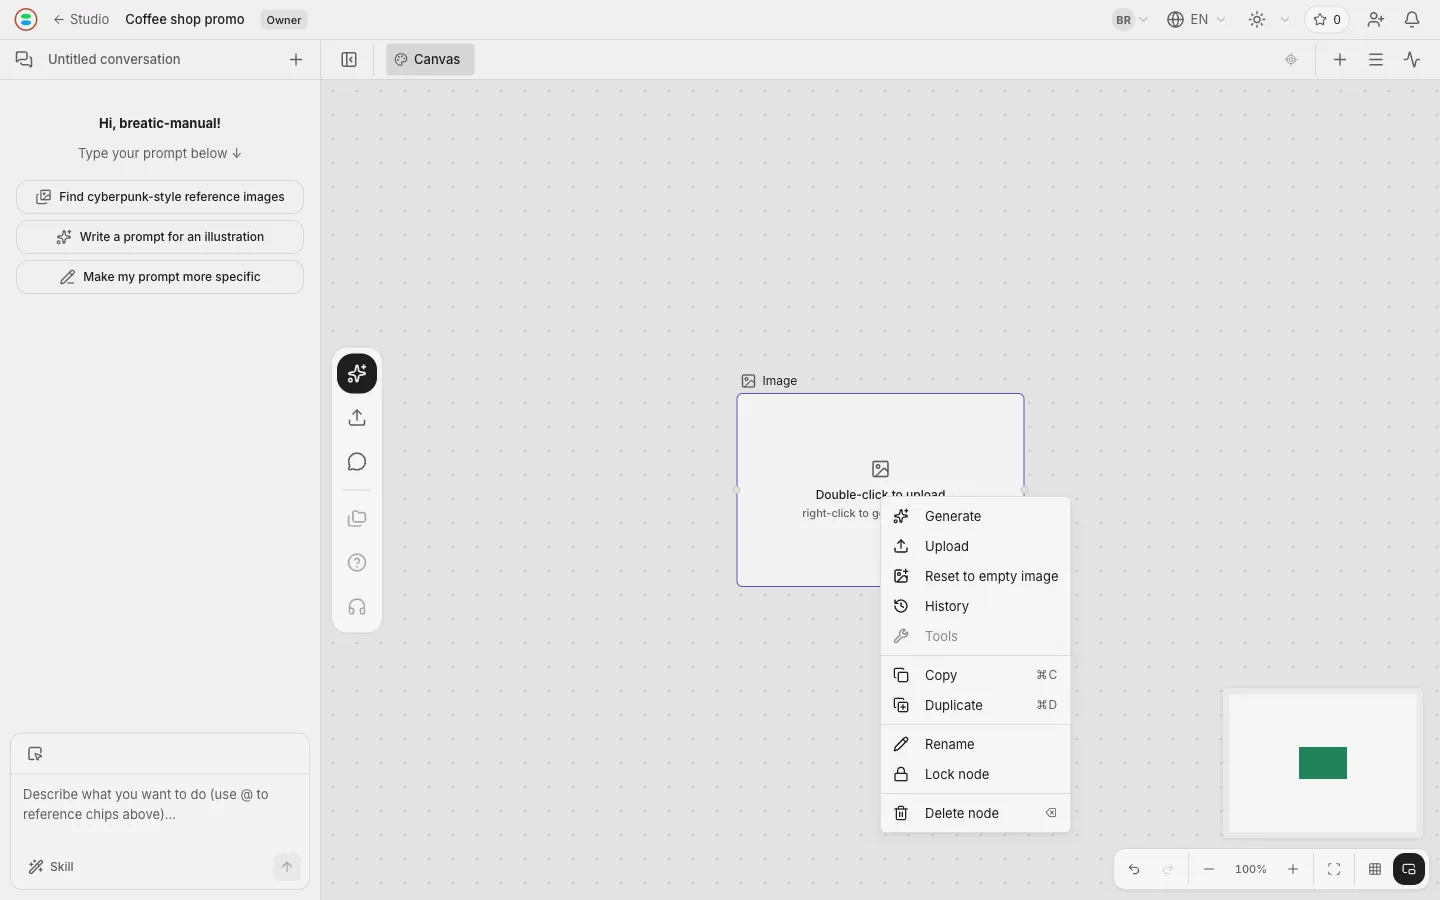
Right-click the node and choose Generate
Alongside "Generate" and "Upload" the menu carries "Reset to empty image", "History", plus copy, rename, lock and delete. Tools is greyed out.
06
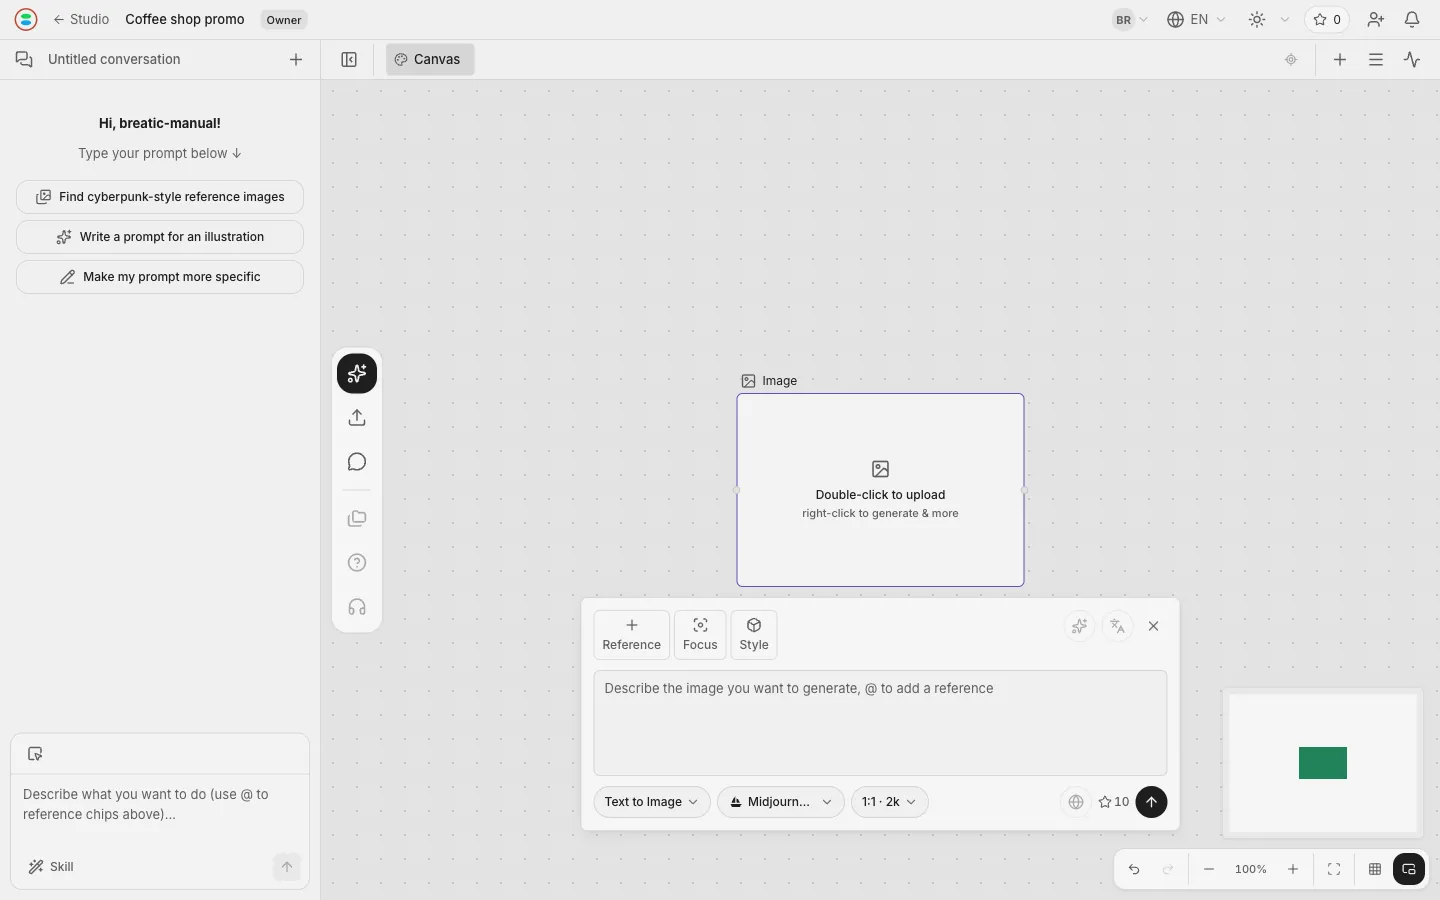
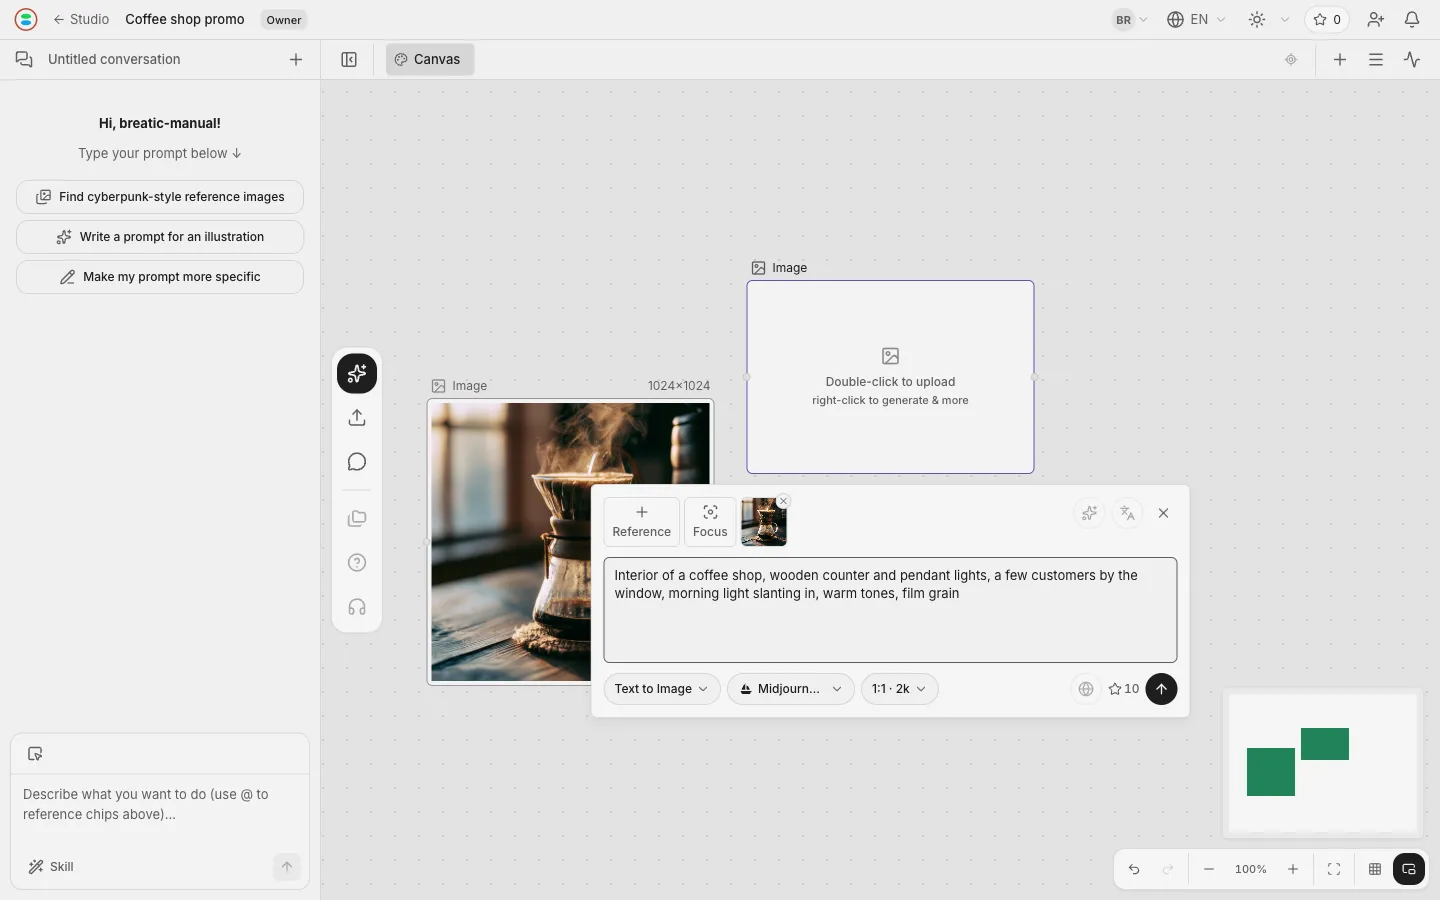
The generate panel
The panel hangs below the node. Top to bottom:
Where
What it is
Three buttons, top left
The reference slots: Reference, Focus, Style
The large box
The prompt. Its placeholder reads "Describe the image you want to generate, @ to add a reference"
Bottom left to right
Mode (Text to Image), model (Midjourney V7), ratio and resolution (1:1 · 2k)
Bottom right
Web search (greyed out), what this run costs (10 credits), the generate button
Switching model changes the whole panel, not just the price — resolution tiers, which reference slots work, extra controls. This example stays on Midjourney V7 throughout because its style slot is available.
07
Write the first prompt
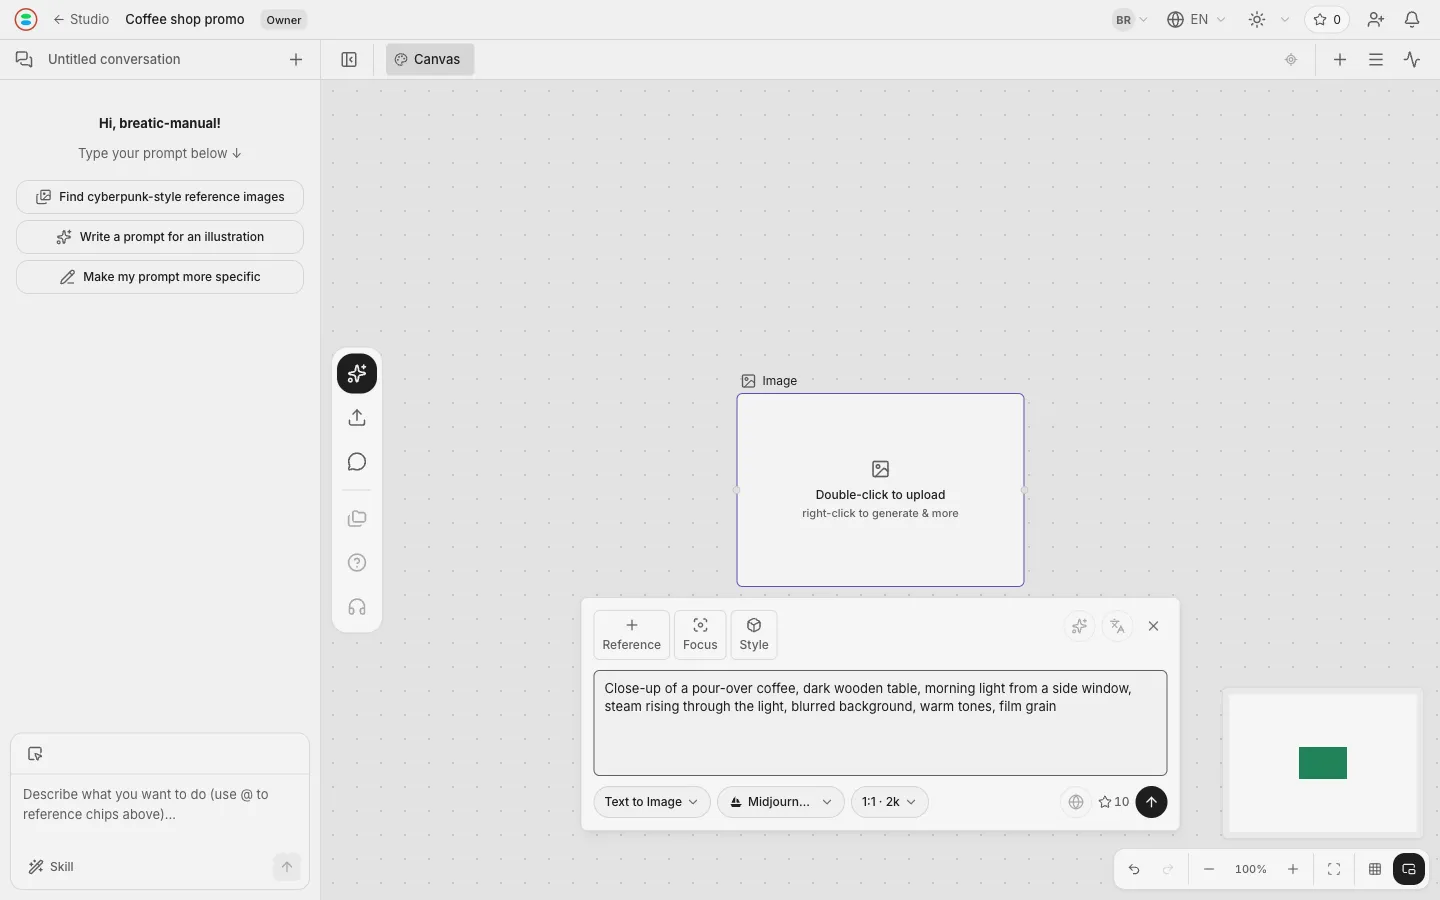
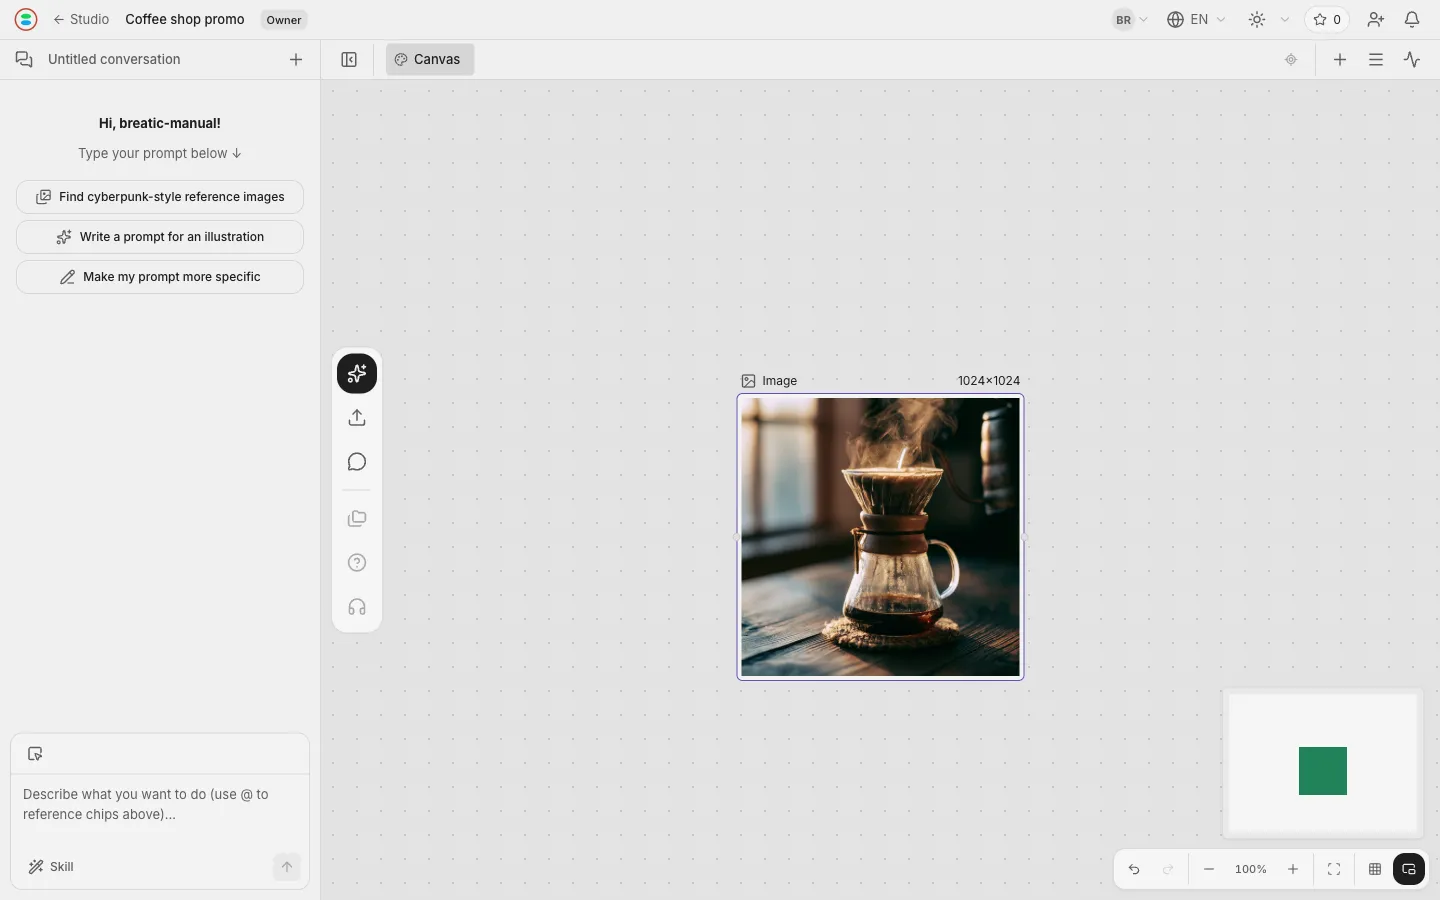
The first one reads:
The two images after this one follow its style, so spell out the light and the texture here — “morning light from a side window”, “warm tones”, “film grain” are what set the look of the whole set.
Close-up of a pour-over coffee, dark wooden table, morning light from a side window, steam rising through the light, blurred background, warm tones, film grain
08
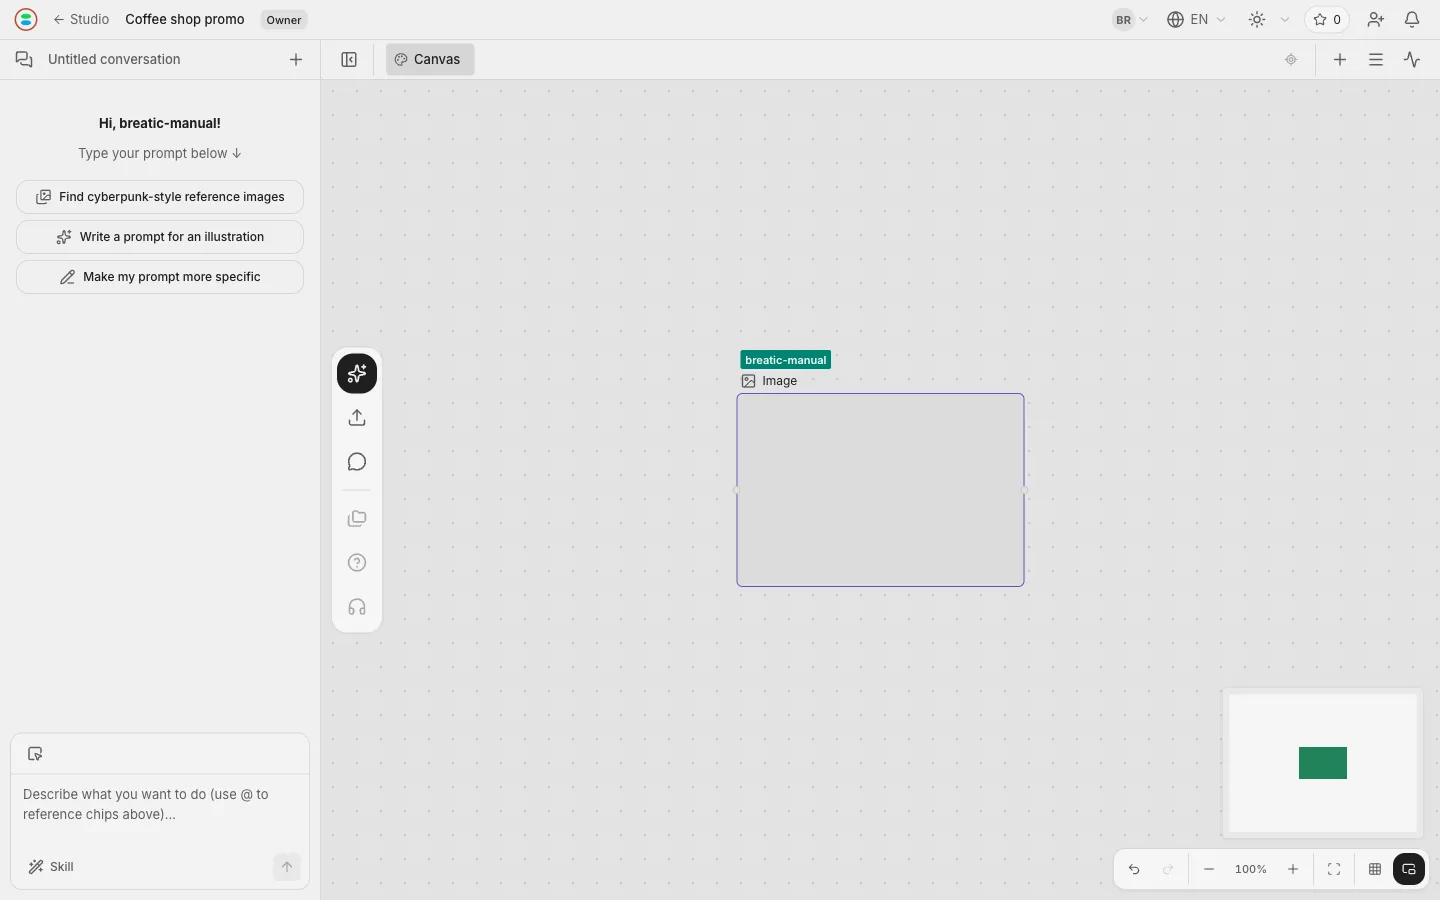
Hit generate and the node starts loading
The node turns into a grey gradient and a green label appears top-left naming whoever is occupying it. In a shared Project that label tells everyone else the node is in use.
Midjourney V7 takes a while. Across this example's four images most came back in around a minute, the slowest well past two and a half. You can build the next node while you wait.
09
The first image arrives
The node is marked 1024×1024 top-right. This image is the style source for the rest of the set.
10
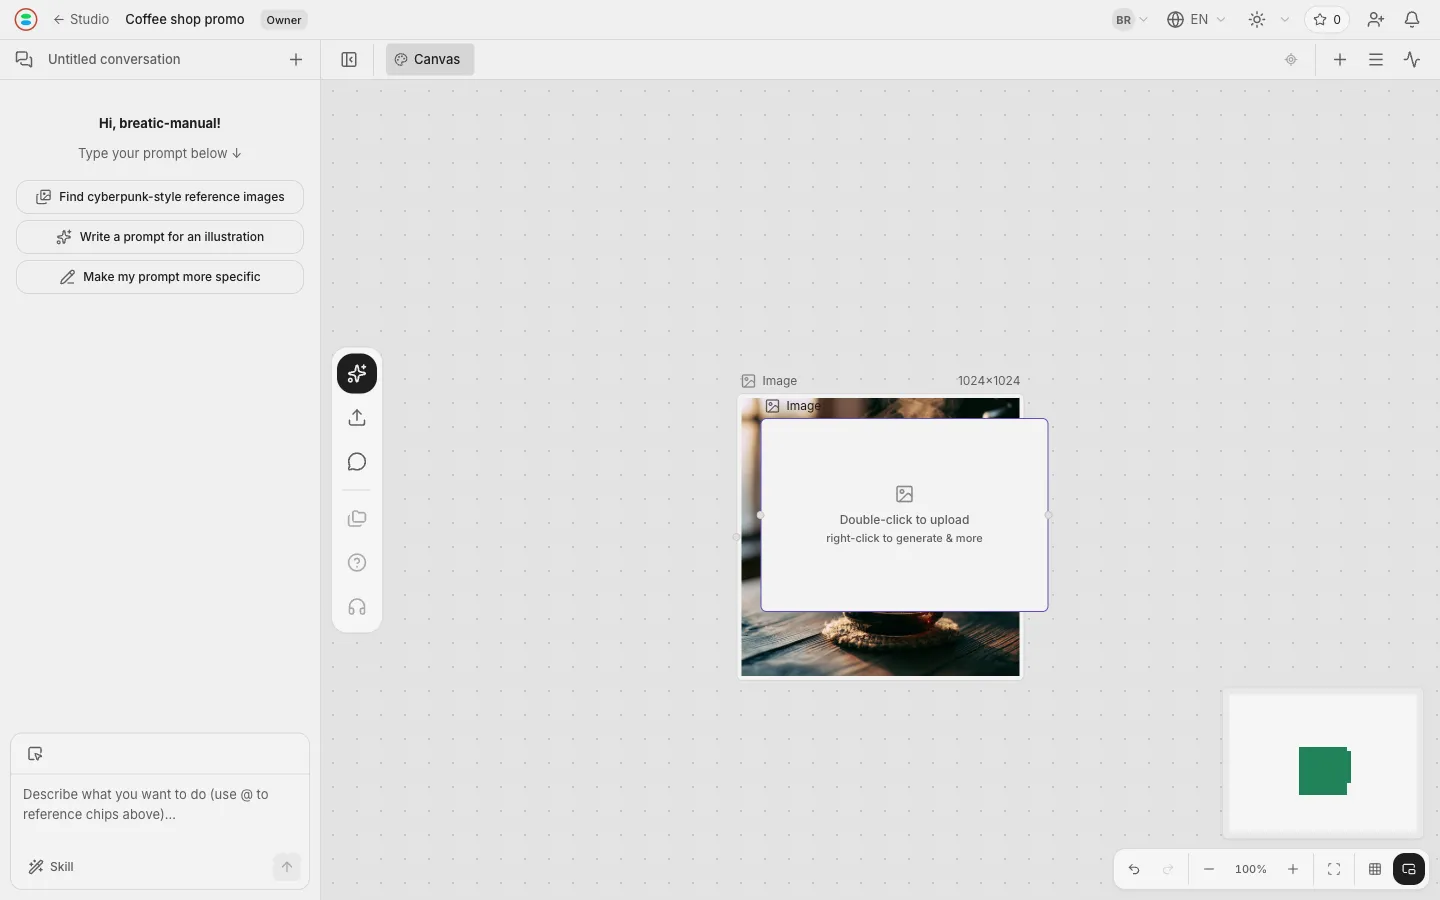
Create a second image node — it lands on top of the first
Node library, Image, same as before.
A new node always lands dead centre of the canvas, so from the second one on it will cover what is already there. Nothing is wrong; drag it off.
11
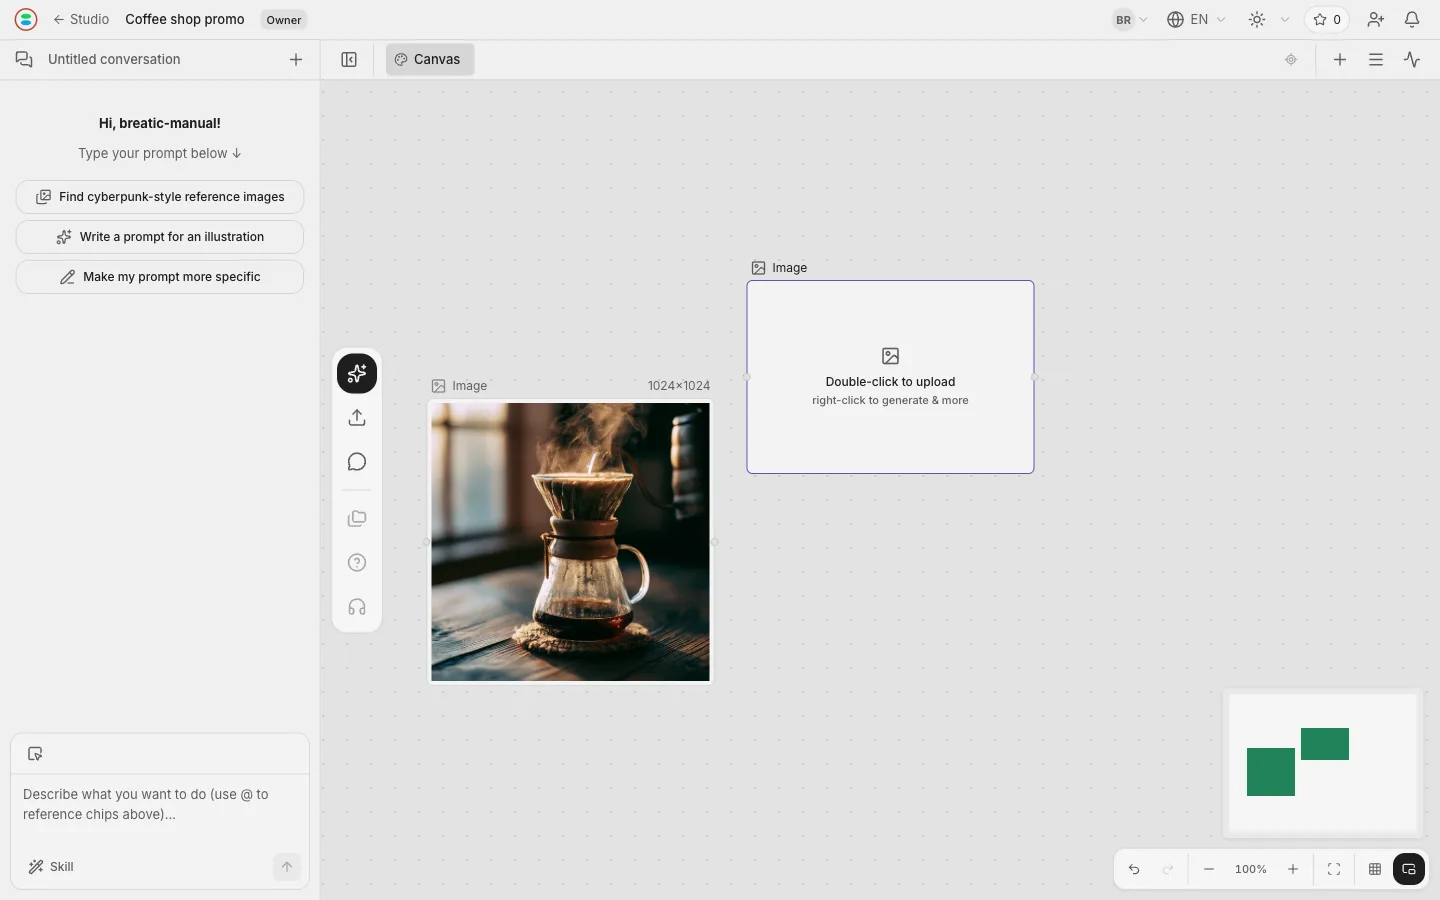
Drag the new node aside
Drag the node into open space. With both visible you can point at the first one when you pick the style reference.
12
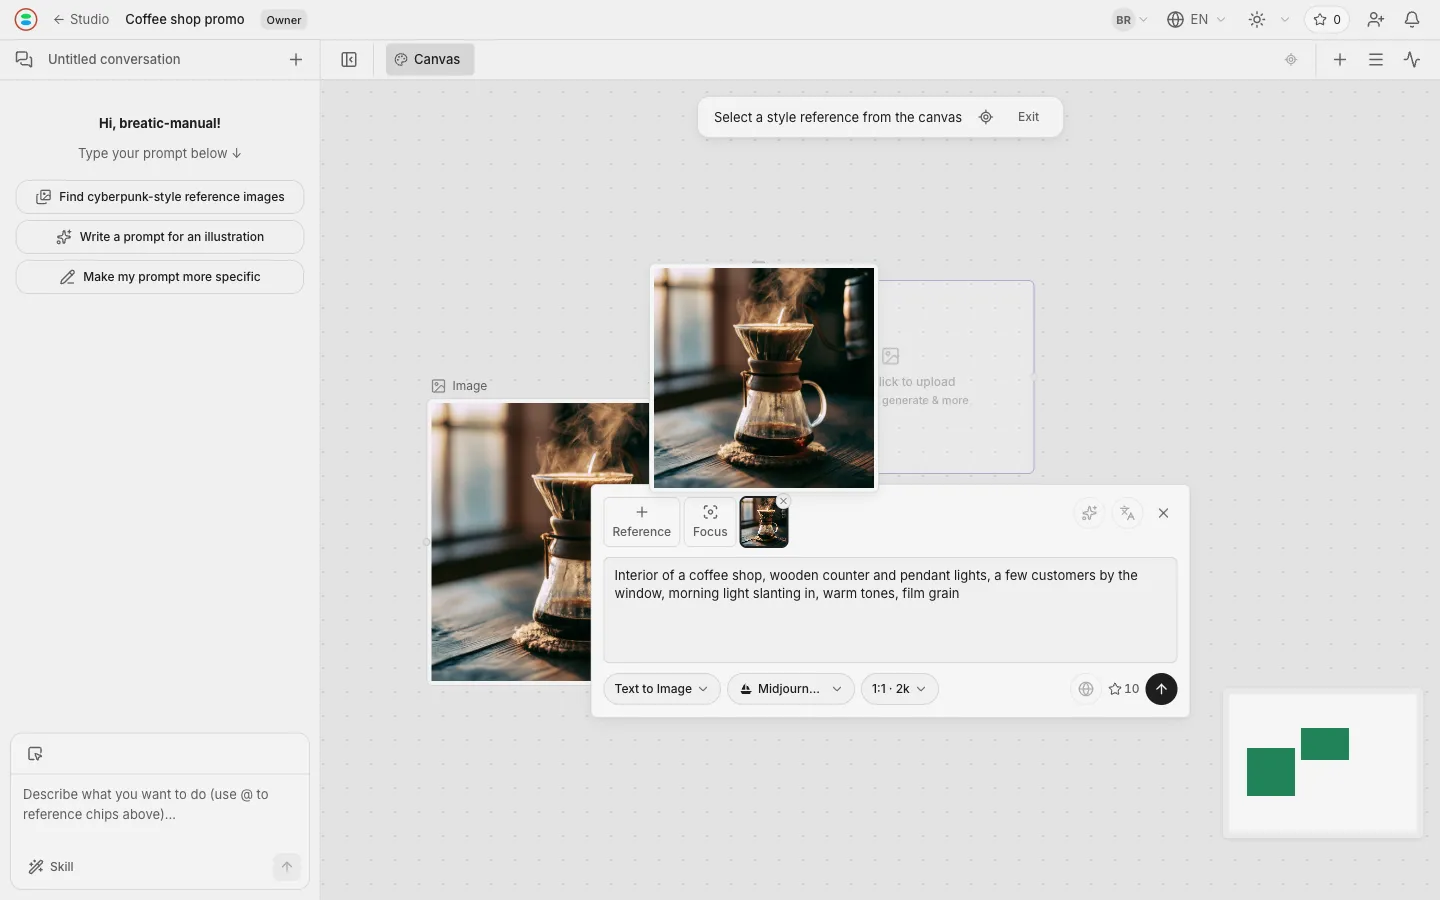
Right-click the new node, Generate, then click Style
Click "Style" in the top-left of the panel. The canvas enters pick mode: a bar appears at the top reading "Select a style reference from the canvas", with a locate button and "Exit" beside it. Every image node on the canvas is now clickable.
No wiring needed. Just click the image on the canvas.
13
Click the first image; the slot becomes its thumbnail
The "Style" button turns into a thumbnail of the first image with an × to clear it. Pick mode exits on its own.
14
Write the second prompt
The second one reads:
The subject changed; the style wording carried over from the first prompt. Together with the thumbnail in the slot, that is two things pulling the same way.
Interior of a coffee shop, wooden counter and pendant lights, a few customers by the window, morning light slanting in, warm tones, film grain
15
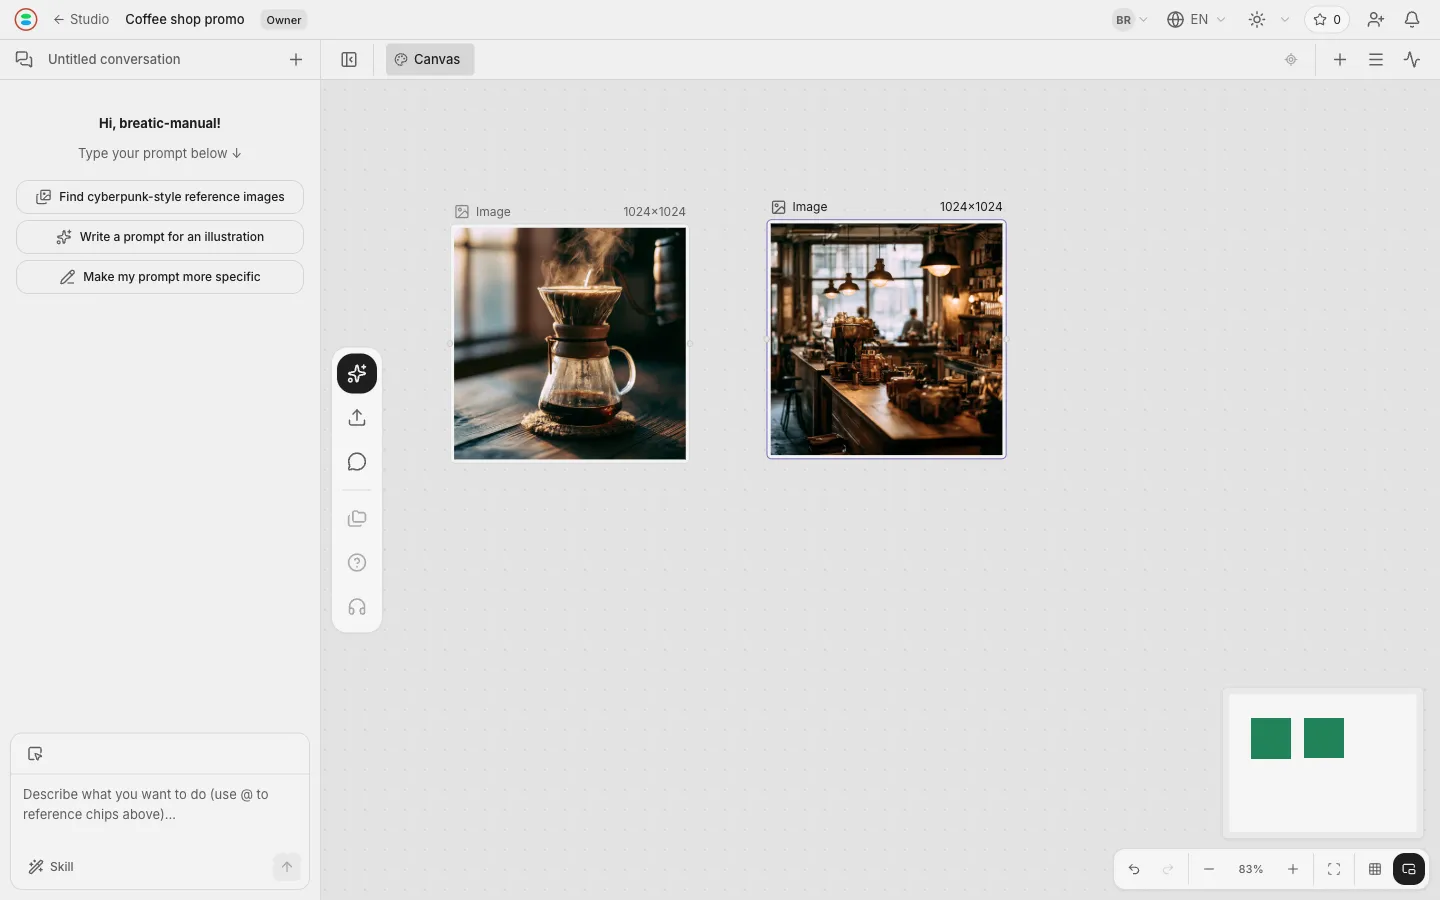
The second image, next to the first
The subjects have nothing in common — one is a tabletop close-up, one is a room — but the warm light, the wood and the shallow focus do.
16
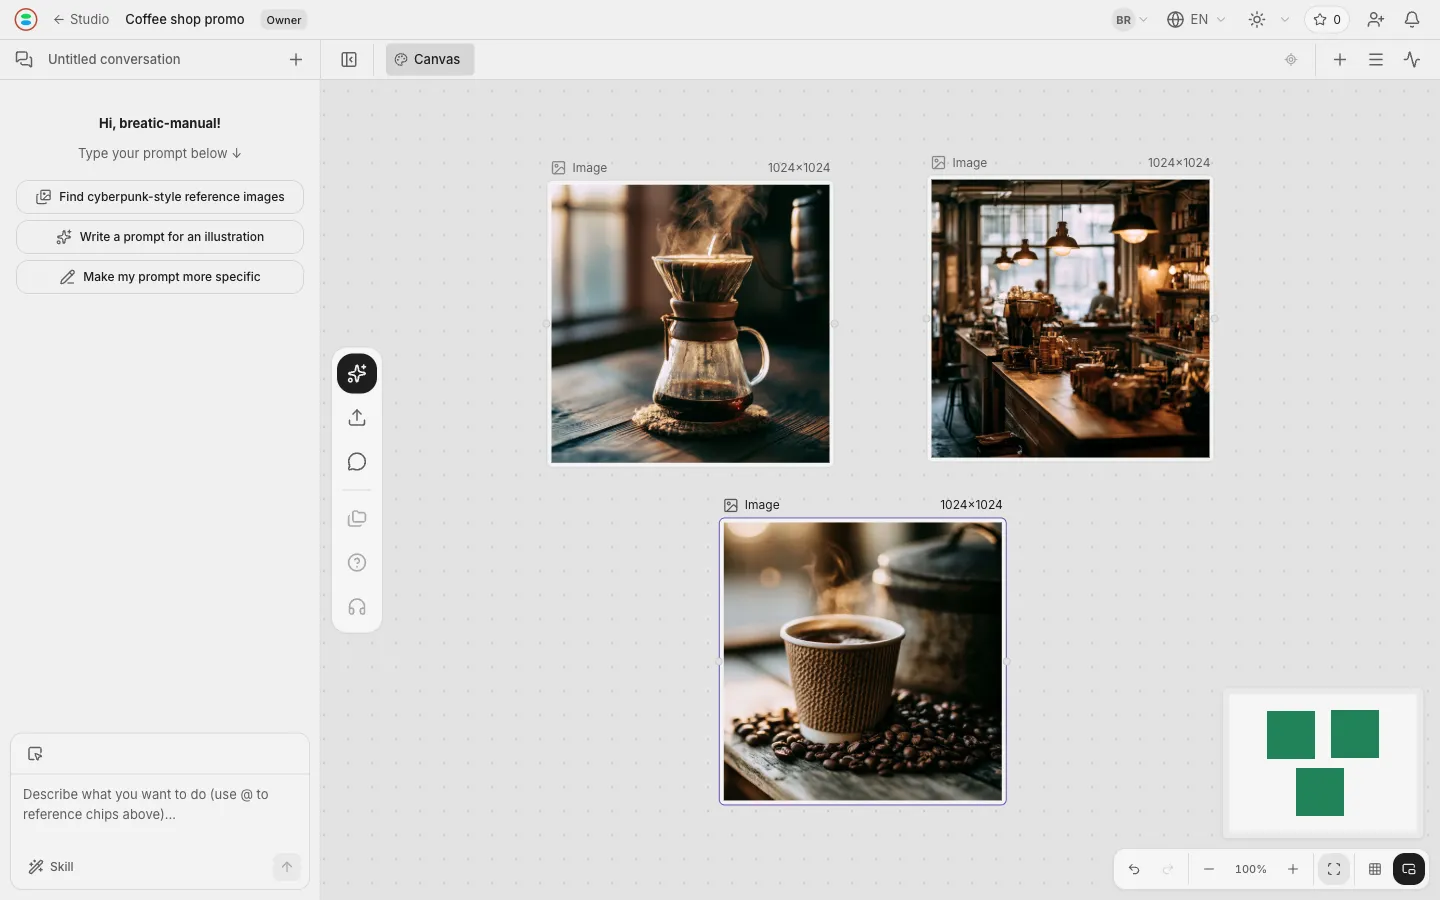
The third image, the same way
Another node, dragged clear, right-click generate, Style, click the first image. The prompt becomes:
Put the three together and they read as one shop, one hour, one camera.
Still life close-up of a takeaway coffee cup on a wooden surface, coffee beans scattered beside it, side backlight, warm tones, film grain
17
The control: what happens with no style reference
One more node, no style reference, the exact same prompt as the third image.
Bottom right and bottom left are the same prompt, twice: the right one had a style reference, the left one did not.
Aspect
With a style reference
Without
Background
Warm brown, thrown out of focus
Bright cool planks, every detail sharp
Light
Side backlight, the first image's direction
Flat and even, from nowhere in particular
Overall
Reads as one of the set
A clean product shot on its own
The prompt spelled out “side backlight”, “warm tones”, “film grain”, and the bottom-left image went its own way anyway. Words cannot hold a style; one reference image can.
Things that came up along the way
What happens
What is going on
A Chinese Project name produces no slug
Type one, or leave it empty
Every new node lands on top of the existing ones
They arrive dead centre of the canvas; drag them off
Park a node bottom-right and Generate is unclickable
The panel hangs below the node and slides under the viewport toolbar or the minimap, both bottom-right. Move the node up and left
Two minutes in and it is still spinning
That is Midjourney V7's pace. Wait until the image is on the node
Getting all four images on screen
"Fit to viewport", in the viewport toolbar bottom-right
What this example leaves out
@ references, the Focus and Reference slots, image-to-video, Document, the Agent panel. Those belong to later examples — one example, one thing. @ references are the product's other core interaction and deserve an example of their own.
Models
What you can pick from
You choose a mode first — text to image, image to video, transcribe — and the picker then offers the models that serve it. Credits are charged per run; the times are the config's worst case, not an average.
Image
8
Model
What it does
Credits
Time
Background Remover
Remove background AI cutout, transparent PNG with an alpha matte
1
15s
Midjourney V7
Text to image Best-looking output, artistic and cinematic
10
60s
Nano Banana Pro
Text to image Flagship quality, 4K, camera and lens controls
7
50s
Nano Banana 2
Text to image Fast and good; the default for everyday work
4.5
25s
Nano Banana Pro Edit
Image to image · Edit Flagship editor, up to 14 reference images
7
50s
Nano Banana 2 Edit
Image to image · Edit Fast editor, with web search
4.5
25s
Seedream 5.0 Lite
Text to image Newest, with reasoning and web search
4
20s
Topaz Upscale
Upscale Upscale to 2K, 4K or 8K
7
30s
Video
16
Model
What it does
Credits
Time
Kling O3 Pro
Text to video Kling's newest flagship, best quality
56
120s
Kling O3 Pro I2V
Image to video · First and last frame Kling O3, image to video
56
120s
Kling O3 Pro Ref
Reference to video Kling O3, reference images to video
56
120s
Kling O3 Pro Edit
Edit Kling O3, video editing
84
180s
Kling V3 Pro Motion
Motion control Kling V3, motion control
84
180s
OmniHuman 1.5
Talking head One portrait plus audio makes a talking head
25
180s
Video Upscale Pro
Upscale Video upscale that rebuilds detail
15
120s
RIFE Frame Interpolation
Frame interpolation Doubles the frame rate for smoother motion
5
30s
Seedance 1.5 Pro I2V
Image to video · First and last frame Seedance 1.5, image to video
60
120s
Seedance 2.0
Text to video ByteDance's newest, multimodal references
80
180s
VEO 3.1
Text to video Google's newest, with its own audio track
100
180s
VEO 3.1 I2V
Image to video VEO 3.1, image to video
100
180s
VEO 3.1 Extend
Extend Carries an existing video further
100
180s
VEO 3.1 Fast
Text to video VEO 3.1, the fast variant
80
120s
VEO 3.1 Lite
Text to video The cheapest of Google's video models
30
90s
Wan 2.2 Animate
Animate Wan 2.2, animates an image
20
120s
Audio
4
Model
What it does
Credits
Time
ElevenLabs SFX V2
Sound effects Sound effects from text, 0.5 to 22 seconds
5
30s
MiniMax Music 2.5
Text to music Studio grade, over 100 instruments
50
180s
MiniMax Music 01
Audio to music Voice cloning and style transfer
10
120s
AI Vocal Remover
Separate vocals Splits vocals from the instrumental
2
30s
Speech
3
Model
What it does
Credits
Time
ElevenLabs V3
Text to speech The most natural, and it carries emotion
10
30s
F5 TTS
Voice cloning Clones a voice from a single sample
5
30s
Fish S2 Pro
Text to speech TTS-Arena #1, over 80 languages
3
10s
3D
4
Model
What it does
Credits
Time
Hunyuan3D V3
Text to 3D Tencent Hunyuan, three quality tiers
25
120s
Hunyuan3D V3 Image-to-3D
Image to 3D Multi-view input, PBR materials
23
120s
Hunyuan3D V3.1 Rapid
Image to 3D The fastest and cheapest image to 3D
2
30s
Meshy 6 Text-to-3D
Text to 3D Best quality, with PBR textures
80
600s
Understanding
7
Model
What it does
Credits
Time
Gemini Flash Image
Read an image The cheapest way to read an image
1
10s
Gemini Flash Video
Read a video The cheapest way to read a video
3
30s
Gemini Flash Audio
Listen to audio The cheapest way to listen to audio
2
20s
Gemini Pro Image
Read an image Reads an image most accurately
5
15s
Gemini Pro Video
Read a video Reads a video most accurately
10
45s
Gemini Pro Audio
Listen to audio Listens most accurately
5
30s
Whisper Large V3 Turbo
Transcribe The fastest transcription, 30% cheaper
1
15s
A deployment only offers the models it holds an API key for, so what you see in the product can be a subset of this list.
Chosen for you
Three places we pick the model
Everywhere else the model is yours to choose. These three run on one we set, and your text reaches it the same way it reaches any other provider.
Nano Banana turns your description into a structured prompt before it draws — the Edit variants skip thisdeepseek/deepseek-chat
The editor's ten text tools: polish, expand, summarise, translate, rewrite, continue, generate, character, storyboard, scriptgoogle/gemini-2.5-flash
The assistant's replies, and the summaries it writes into memorydeepseek/deepseek-v4-pro
Where this manual stands
Breatic has not launched, and the manual tracks the product: when the interface changes the screenshots are retaken and the steps rewritten. One example so far; @ references, image-to-video and Document follow one at a time.